

3 Power Automate Tips Every Citizen Developer Wishes They’d Learned Sooner
If you’ve ever cracked open a Power Automate flow you built six months ago and thought, “Who… who did this? Was it me? Why would I do this to myself?” — Welcome, you’re officially a citizen developer.
The good news? A few small habits can save you from future‑you’s wrath. Forte Design’s “Citizen Developers 101” lays out three simple but game‑changing tips that make your flows cleaner, smarter, and way easier to maintain.
Let’s talk about them like real humans who’ve all built at least one chaotic flow.
1. Name Your Actions (Your Future Self Will Thank You)
Power Automate is great at many things. Naming actions is not one of them.
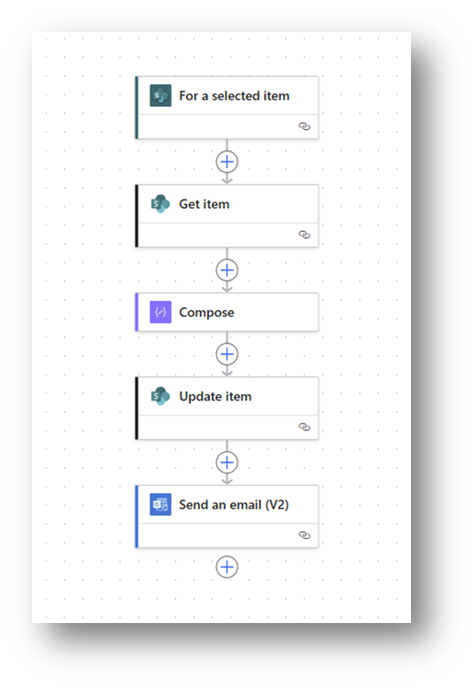
Workflow actions with a Compose step added
Every action drops in with a generic label like “Get item” or “Update file”. That’s fine when you’re building… until you come back later and have to click into every single card to remember what it does.
Rename them. All of them.
Call things what they do, not what they are:
“Calculate New Due Date”
“Notify Owner”
“Format Email Body”
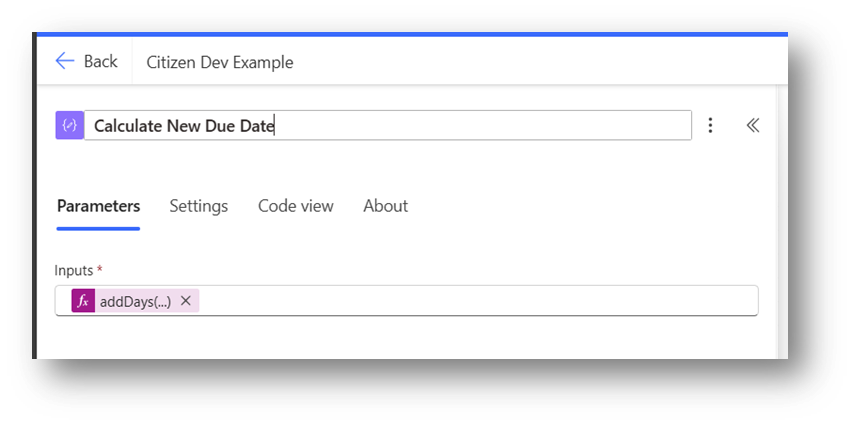
Compose step updated to read what it actually does Calculate New Due Date
With renaming, suddenly your flow reads like a story instead of a mystery novel.
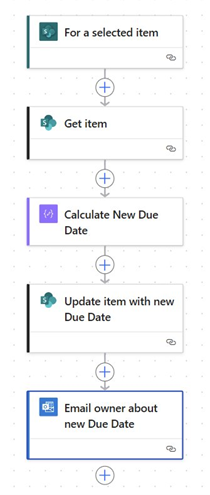
With descriptive names you have a better idea of what each step is doing
Pro tip: Name your flows clearly too. “Citizen Dev Example” tells you nothing, where “PROD-Set Due Date and Notify Owner” tells you everything.
At Forte Design we have a pattern for naming our workflows because we back each other up as a team. We know that DEV-<Name of workflow> means that the workflow is currently being built and has not been published to production, and PROD-<Name of workflow"> means that it is in use in Production.
2. Build Your Own Error Notifications
(Because Silence Is Not Golden)
Here’s a fun fact: when a flow fails, Power Automate doesn’t tell you.
Not right away. Not reliably. Sometimes not at all.
So, if you want to know when something breaks (and you do) you need your own error handling.
The easiest pattern:
Put your main actions inside a Main Scope

Workflow without Scopes
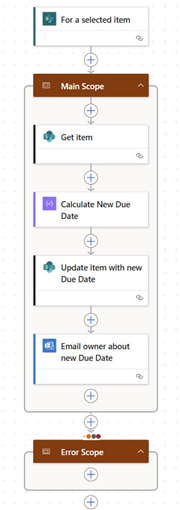
Workflow with Scopes added
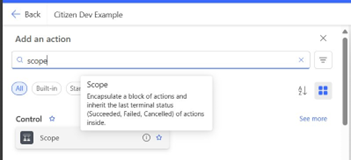
Add an Error Scope right after the Main Scope
Set the Error Scope to run only when the Main Scop fails, times out or is skipped.
Now you can drop in whatever “uh‑oh” actions you want:
Email yourself
Update a status column
Create a support ticket
It’s simple, it’s clean, and it means you won’t find out three days later that your flow has been quietly face‑planting.
Bonus: There’s a handy expression that generates a direct link to the failed run. Paste it into your error email and troubleshooting becomes a breeze.
3. Choose the Right Dynamic Content (Yes, It Matters)
Dynamic content is one of those things that seems straightforward… until you realize there are two identical “Due Date” fields and only one of them is the one you actually want. For this example, we are getting items from a SharePoint list.
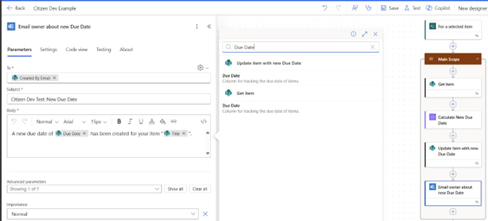
Example Send Email action with Due Date in the email message
Here’s how you make sure you have the right content to choose:
Always add a Get item (or Get file properties) action right after your trigger.
Get item action added right after the trigger
Why?
Triggers don’t always include all metadata.
You get a consistent, reliable source of dynamic content.
You avoid mixing “before” and “after” values
You can change the trigger later without breaking everything.
Think of it as your flow’s anchor point. Everything else stays cleaner because of it.
Want to Level Up Even More?
General Help: Check out the Microsoft Learn page for Power Automate: Power Automate on Microsoft Learn | Microsoft Learn
Flows not behaving? Check your Connections: https://make.powerautomate.com/environments/[YOUR ENVIRONMENT GUID]/connections
Not sure how to use expressions? Check out this full reference list: https://learn.microsoft.com/en-us/azure/logic-apps/expression-functions-reference
Want to take your skills to the next level?
If you are curious to learn more, or if you stuck and need assistance use our Contact Us form below to drop us a line. We're happy to join you on a short call to help take a look. Plus, we have way more than three tips (we've been around for 15 years). We have best practices, guidance, suggestions from SharePoint Intranets to Farm Admin recommendations, and even tips to make your AI Agents more effective.
These tips were shared by one of our seasoned Power Automate Developers, Zac Young. If you would like to learn more about Power Automate or need help with your project, please use our Contact Us form below.